Application of mould products
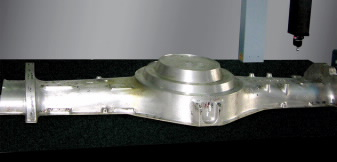
【Typical Clients】Kangxin Mould Co., Ltd is a Hi-tech company engaging in professional development and manufacture of die casting mould, which applies 3D modeling design and has advanced digital controlled processing equipment. The company has realized the digitalization in mould manufacture.
【Problems】:High requirement on mould precision and digitalization shortens the period of product development, research and manufacture. To adapt higher demand of the market and clients is the reason to select measuring machine.
By various mould, fixture and tools, advanced process and designing technology provide appropriate method to manufacture good quality products efficiently. Also, all kinds of measuring systems provide proper methods to installation and debugging of mould, tools, fixture and the entire production line.

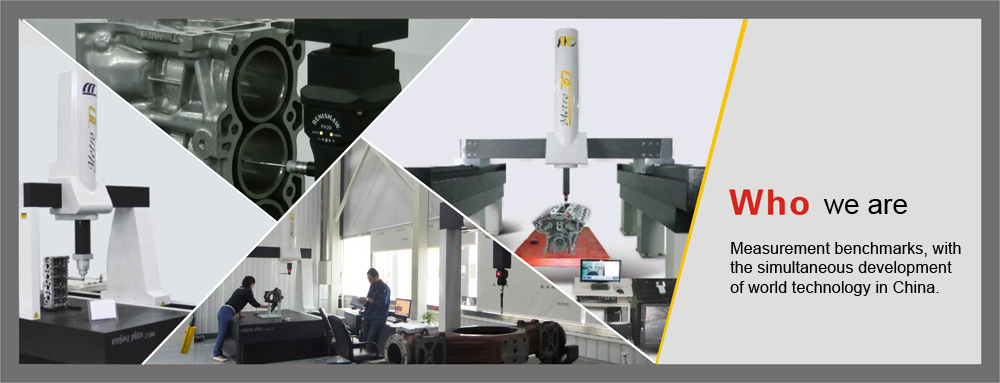
【Solution】 After deep survey, evaluation and comparative test, Kangxin Mould finally selected Enjoy7107 moving gantry type measuring machine, of which measuring range is 700×1000×700mm. Its broadness is bigger and can allow 900×1200×900mm dimension of workpiece at most. All the axes apply granite with big section area as basis guideway, which can ensure precision stability for a long term and influence of changed temperature on precision. The design of big span makes the machine possess good dynamic characteristics. Air bearing with high stiffness and distribution of big span enhance the precision and stable running for the entire machine.
Usually, once the workpiece is installed, engineers will input CAD model of the workpiece to establish coordinate system. The coordinate system has many ways to align with theoretical CAD mathematical model. The most rapid and most simple way can be employed subject to characteristics of the workpiece, and inspect mould guide rod and the characteristics required by clients. Clients should find appropriate points on the workpiece, formulate plane or boundary point vector so as to confirm the position, i.e. find the point and immediately measure it subject to CAD mathematical model. The development and manufacture of model include cambered surface deviation, characteristic and position of edge, measurement of section and other results of measurement to rapidly realize verfication, adjustment and other operations of workpiece. Strong CAD function of PS-DMIS can swiftly provide detailed information about the surface of factual mould, which easily matches with theoretical CAD of original design and assists to prepare a plan about mould processing and how to repair so as to accurately point out the cause of problem, and provide correct operation method to reduce the time spent on repeatable experiments.
The following is about positive measurement. Measuring machine can play a full effect on measurement after the products are intensively processed. The dimension of products processed by processing center, turning center, universal grinder and CNC lathe must be measured by coordinate system to obtain data and common measuring tools are unable to measure these dimensions. Based upon drawings, establish a linear coordinate to conduct measurement and finish measuring distance, angle, dimension of hole and shaft diameter and tolerance of form and position including planeness, parallelism, verticality, position, axiality, cycle run-out, profile of curve and cambered surface. The data can be used to verify precision of each machine, looseness of position clamping, abrasion of cutting tools and distortion of products. While these measuring dimensions can be programmed and they can be automatically measured through program. A measurement report can be automatically output or IGS format, labeling dimension by CAD software and analyzing the precision of processing dimension. Since punching products have strong contractibility, w can apply the establishment of coordinate system and manually measure punching products to obtain relevant data.
Mould development is the most important aspect for this company. The company has a professional modeling design studio, which is strong in technical force. They have carried out more and more reverse engineering and the application of reverse engineering has become very important.
Based upon archetype or practicability, reverse engineering is to design to greatly reduce the development cycle of products, which is the only way to conduct precise geometric modeling of parts without original geometric information. Through reverse engineering, the geometric shape of products can be rapidly transformed to meet the requirements of serialization and diversification. Often, the company has to use coordinate measuring machine providing reverse modeling information of moulds which have no CAD model, drawing and dimension only depending upon the practicality. Enjoy bears unique TP-Scan scanning functions. It measures the practicality digitally and carries out data collection of practical workpiece through triggering scanning probe (TP20). As for reverse engineering, the modeling of curve and cambered surface is the most important and most complicated point. The processing of model has to be finished at last and smooth model of cambered surface or a triangle gridding generated from good point group. Therefore, processing of punctual data and establishing way of cambered surface, perfection of compilation and analyzing functions are such an important part in rebuilding cambered surface model. PS-DMIS possesses point cloud management and compartmentalized tool, small plane modeling and compartmentalized tool, robust curve establishing tool, robust cambered surface modeling and shape identification tool, these can enable loose points to form a cambered surface easily and conveniently and transfer the existing products into 3D mathematical model. It is very convenient for clients.
For measurement of mathematical model and comparison among models, first of all, analyze the product structure and find out the original base, tack hole and processing position. It is optimum to fulfill all measuring requirements by using a probe; remove all burr and fash on the joint of profiles; find out the theoretical plane of placement face or several equal height points fixed on the fixture of tools; seek out theoretical straight line of product axes and align it to zero position, namely, straightening by selecting the points. Manually select points, minor inerratic points to measure using locked axis. If the cambered surface is irregular or complicated, more curves should be measured and select some more dense point data. Data collection: For data collection of sequenced points, by trigger scanning probe (TP20), the product should be digitally measured. The point data collected are sequenced. Data processing: through reverse engineering (point cloud treatment) PS-DMIS software, the point cloud data collected are removed noise, curve/cambered surface creation and modification. Secondly, the point cloud data should be output from model processing and treatment CAD software, for example, PowerShape, UG, Pro/E, Catia and Cimatron. Analyze the results and CNC processing/rapid modeling RP, and complete mass production of products.
Although the products manufactured by all companies as well as requirements and functions of coordinate are all different, precision is equally demanded. Good precision and running status of Enjoy measuring machine are regarded as the final standard for verification and evaluation and the most authoritative data report. The machine has provided accurate data analysis in grinding tool’s development, repair of manufacturing process and final evaluation. Combining NC processing technology with RP rapid modeling technology, the period for development, research and manufacture of product can be greatly minimized, which creates conditions for new products’ entry into the market. The company has obtained great benefits and helped Kangxin Mould to play a leading role in local mould industry.
Address:Licang Sci-Tech Industrial Base, 320# Jiushuidong Road, Qingdao, China. Postcode:266100
Telephone:+86-0532-87602111 Fax:+86-0532-87602020 E-mail: info@metro-3d.com 鲁ICP备14028182号-2


